Recently I wanted to add some customization to some of my menu items. So I decided to add a CSS class to those particular menu items. I could modify my theme code and add some custom functions to do that. However, I first decided to explore the WordPress options and see if there was already some thing built in to do this. I found that there is an easy way to do this. This is normally a hidden option and in this post I will tell you how we can easily do that.
How to add CSS classes to WordPress menu item
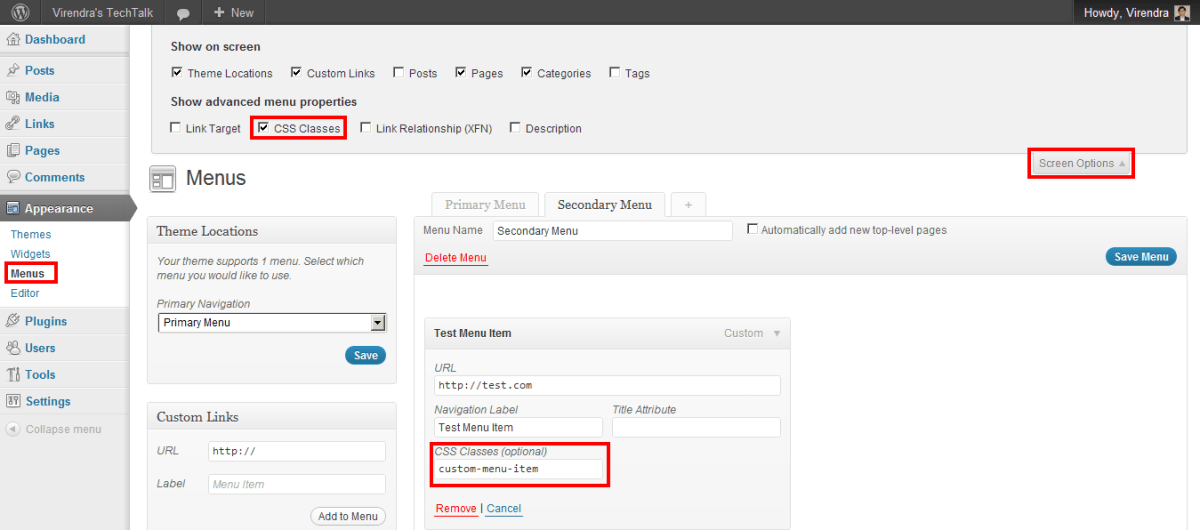
1. Go to Appearance -> Menus in your sidebar
2. On the top right of the screen click the “Screen Options” tab
3. Check the “CSS Classes” option in the Screen Options tab. You don’t need to save, the changes will be visible immediately
4. Add or open up the menu item you wish to add the CSS Classes to. Now you will see a field that says “CSS Classes (optional)”. Add the CSS classes there
5. Click “Save Menu” to save your changes
These steps should work with WordPress 3.0+.

Recently made a site which has different color for each menu item. Now this is a small site so I managed with :first-child and :last-child in my css.
But next time I will use this built-in solution, for sure.
Thank you for sharing!
Hello!
May i ask if you would share the CSS code for the custom menu item colors.
Thank you